Rustic Sourdough Bread
A delicious take on traditional sourdough. Rye and whole wheat flour in this rustic sourdough bread create a delicious flavor with a crisp exterior and fluffy interior.
Ingredients
- 375 g organic white bread flour or organic all-purpose flour
- 85 g organic whole wheat flour
- 40 g organic rye flour
- 375 g filtered water
- 100 g active starter
- 10 g sea salt (2tsp)
Instructions
- Feed sourdough starter in order to prepare it for the next morning. For more information on starting and maintaining a starter click here. I also like this video for learning how to make a starter. (The time you choose to feed your starter will depend on the time it takes it to reach its peak for use. This will change depending upon temperature, altitude, type of flour used, maturity of the starter, etc.)
- Combine flour, water, starter and salt. Mix until a shaggy dough forms. You are looking for hydration of all of the flour at this stage, rather than shaping or strength to be built. Cover the dough with a damp towel.
- Begin your first stretch and fold. Wet your hands to avoid the dough sticking to them, grab one side of the dough and pull it up with a wiggling or bouncing motion, stretching it as far as it will go without tearing. Place into the center of the dough. Turn the bowl one quarter of the way and repeat this process. Complete this two more times. You will notice that your dough is no longer shaggy and is beginning to take on a smoother, more defined feel to it. Cover the dough.
- Stretch and fold. Cover the dough.
- Do the last stretch and fold. By this stage the dough should have built up strength and taken on a more defined shape. You know that you are ready for bulk fermentation when the dough passes the window pane test. To do the window pane test, take a golf ball sized chunk out of the dough, gently stretch it out between your fingers and try to get it as thin as you can without it tearing. If you can stretch it thin enough to see light through the dough and without significant tearing, you are likely ready to let the dough sit for the remainder of bulk fermentation. Cover the dough and let sit for at least 4 hours. This time may vary depending upon temperature, ripeness of the starter, altitude, etc. I check for the edges to be rounded away from the bowl, for bubbles on the top of the dough as well as visible through the sides of the dough, and for the dough to have risen as least 20-50%. (Note: be sure that your towel doesn’t dry out or you’ll end up with a hard crust that forms over the top of your dough).
- Begin the pre-shaping process. Scoop the dough from the bowl onto the lightly floured counter and bring up the sides to create a ball with the seam on top. Then, gently begin shaping it into a ball by pulling and spinning it toward you (this helps create tension in the dough, creating a good oven spring). Let sit for about 15 minutes covered. (During this time you can generously coat your proofing basket with flour)
- Gently pull the edges and shape into a rectangle while being mindful not to pop the bubbles that we worked so hard to create. Bring up one side and fold it over the middle. Do the same with the other side. Then, fold like a jelly roll. Begin to shape into a ball and place into the proofing basket. Allow to proof about 1-1.5 hours at room temperature. You will know the dough has properly proofed when you stick a finger into the dough and it springs back slowly. If it springs back quickly allow it to proof longer.
- Place into the fridge anywhere from 8-24 hours. (I love the flexibility this gives!).
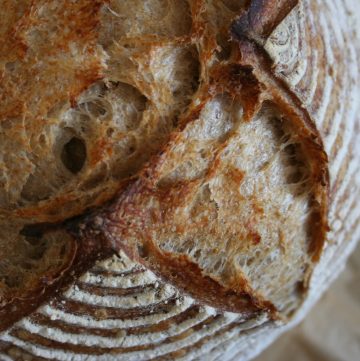
- Turn on the oven and allow the dutch oven to heat for one hour at 500F. Once the oven has heated pull the dough out of the fridge. Coat the dough with flour and flip onto a parchment paper covered plate. Just before placing the shaped dough into the dutch oven, score it to allow a predictable expansion pattern.
- Place the sourdough loaf into the dutch oven with the lid on for 20 minutes.
- After 20 minutes, lower the heat to 450F, carefully remove the lid and allow to bake for about 20-40 minutes. This time varies to allow you to reach the desired color.
- Allow the loaf to cool for a few hours. And now enjoy your very own rustic sourdough bread!
Notes
- Ensure that the sourdough starter is ripe and bubbly
- Be careful not to over ferment the dough
- You can play around with how long you bake your bread without the lid to achieve the desired color
- Let the bread cool completely in order to make it easier to slice and to avoid a gummy texture